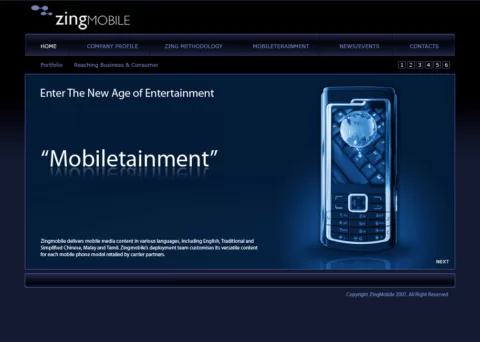
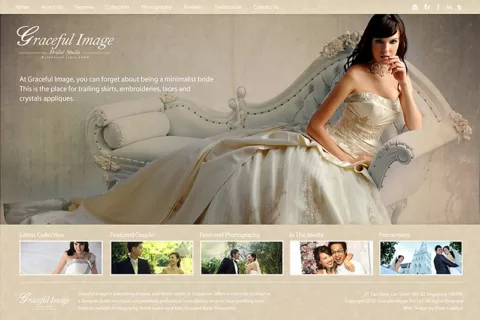
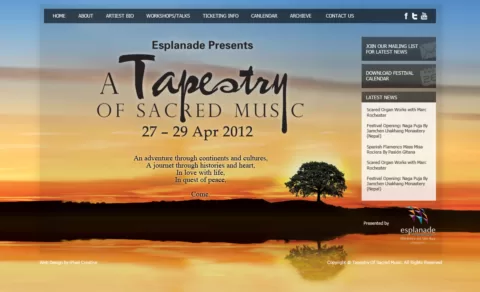
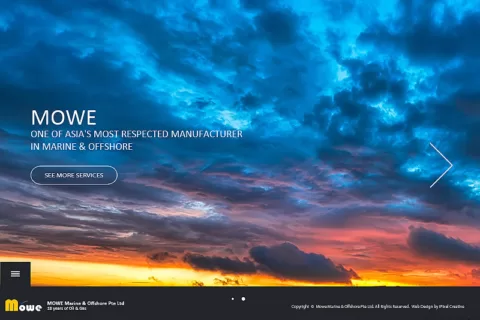
Search

Posts Tagged ‘jQuery’

Smart (Auto-Hiding) Website Header & Footer using jQuery [Tutorial]

Share

There are plenty of reasons for using a sticky header navigation in your website. It provides easy access for top-priority links, plus a way back to the homepage from anywhere on the site. However problems may arise when you have a navigation bar which blocks some of the page content.

jquery ui animated header footer autohiding intelligent tutorial

In this tutorial I want to demonstrate how we can build a locking header bar which will auto-hide itself after scrolling down the page. Also when scrolling to the very bottom we will display a small footer which includes many of the same nav links.

This technique can be used in almost any website interface to improve readability and general user experience.

Building the Framework

We need to start out with a basic HTML5 template using a fixed header and a basic content area. For this demo I have included a series of external third party scripts hosted from Google’s CDN. This includes a couple web fonts along with the jQuery and jQuery UI libraries.

<!doctype html> <html lang="en-US"> <head> <meta http-equiv="Content-Type" content="text/html;charset=utf-8"> <title>Auto-Hiding Header Demo Page</title> <meta name="author" content="Jake Rocheleau"> <link rel="shortcut icon" href="http://www.hongkiat.com/favicon.ico"> <link rel="icon" href="http://www.hongkiat.com/favicon.ico"> <link rel="stylesheet" type="text/css" media="all" href="styles.css"> <link rel="stylesheet" type="text/css" media="all" href="http://fonts.googleapis.com/css?family=Courgette|Leckerli+One"> <script type="text/javascript" src="https://ajax.googleapis.com/ajax/libs/jquery/1.9.1/jquery.min.js"></script> <script type="text/javascript" src="https://ajax.googleapis.com/ajax/libs/jqueryui/1.10.1/jquery-ui.js"></script> <script type="text/javascript" language="javascript" charset="utf-8" src="autohide.js"></script> </head> 

You may notice we also need a third local JavaScript file named autohide.js. This will provide all the JS codes we need to animate and hide/show the header block.

Let’s take a brief look at the content structure to understand how I have laid out the individual div blocks.

<div id="headwrapper"> <div id="fixedheader"> <header id="top"> <div id="logo"> <!-- Logo Source: http://www.psdgraphics.com/psd/psd-power-button/ --> <h1><a href="index.html"><img src="http://media02.hongkiat.com/smart-header-footers-jquery/power-logo.png" alt="AutoHide Header"></a></h1> <h2>intelligent auto-hide effect</h2> <ul id="rightlinks"> <li><a href="javascript:void(0)">Register</a></li> - <li><a href="javascript:void(0)">Login</a></li> - <li><a href="javascript:void(0)">FAQ/Wiki</a></li> - <li><a href="javascript:void(0)">Support</a></li> </ul> </div> <nav id="topnav"> <ul> <li><a href="javascript:void(0)">Homepage</a></li> <li><a href="javascript:void(0)">About Us</a></li> <li><a href="javascript:void(0)">Publications</a></li> <li><a href="javascript:void(0)">Authors</a></li> <li><a href="javascript:void(0)">Other Projects</a></li> <li><a href="javascript:void(0)">Get In Touch</a></li> </ul> </nav> </header> </div> <!-- /end #fixedheader --> </div> <!-- /end #headwrapper --> 

There are a fairly large number of nested divs in the header area so I will explain the structure first. T

he outermost container #headwrapper is given the limited width 780px and a margin: 0 auto; property in CSS. This will center the entire header on the page. Inside is a div #fixedheader which is actually the main fixed item.

This container needs to use a grey background and be pushed up into the top of the page using negative positioning. As the header animates upwards it will first pull down a bit, and without this container we just see the background behind it.

The internal <header> element is the “official” container which holds both the logo and navbar. You can see this brief pull-down effect in the live demo page.

Base CSS Styles

Aside from the inner content we do not need to learn much else about the HTML. All of the internal content areas are pushed exactly enough pixels to meet edge-to-edge with the header. It is much easier to explain how we can style the layout, beginning with a few CSS resets.

html, body, div, span, applet, object, iframe, h1, h2, h3, h4, h5, h6, p, blockquote, pre, a, abbr, acronym, address, big, cite, code, del, dfn, em, img, ins, kbd, q, s, samp, small, strike, strong, sub, sup, tt, var, b, u, i, center, dl, dt, dd, ol, ul, li, fieldset, form, label, legend, table, caption, tbody, tfoot, thead, tr, th, td, article, aside, canvas, details, embed, figure, figcaption, footer, header, hgroup, menu, nav, output, ruby, section, summary, time, mark, audio, video { margin: 0; padding: 0; border: 0; font-size: 100%; font: inherit; vertical-align: baseline; outline: none; -webkit-font-smoothing: antialiased; -webkit-text-size-adjust: 100%; -webkit-box-sizing: border-box; -moz-box-sizing: border-box; box-sizing: border-box; } html { height: 101%; } body {background: #a4b1c2; font-family: Tahoma, Arial, sans-serif; font-size: 62.5%; line-height: 1; } ::selection { background: #f2c6dc; color: #111; } ::-moz-selection { background: #f2c6dc; color: #111; } ::-webkit-selection { background: #f2c6dc; color: #111; } br { line-height: 1.95em; } article, aside, details, figcaption, figure, footer, header, hgroup, menu, nav, section { display: block; } ol, ul { list-style: none; } blockquote, q { quotes: none; } blockquote:before, blockquote:after, q:before, q:after { content: ''; content: none; } strong { font-weight: bold; } table { border-collapse: collapse; border-spacing: 0; } img { border: 0; max-width: 100%; } a { color: #7091c7; } a:hover { color: #4e72ad; } 

Our topmost code is a mixed template I put together for this tutorial which includes a few useful style resets. We are adding the <br> tag selector to increase the size of line breaks, and also CSS3 anti-aliasing on rendered text and various highlighted text effects. Another big point is how we are structuring the overall page to center within the layout.

I am using 2 different wrappers for containing the header and the body. This offers an easier solution to separate content and even merge the idea into a full-width layout. The logo sections and top navigation bar are put together to work as a fluid design, even though this particular layout is fixed-width.

/* page structure */ #fixedheader { display: block; position: fixed; top: -35px; padding-top: 25px; margin: 0; height: auto; width: 780px; background: #303030; z-index: 9999; -webkit-box-shadow: 0 -3px 4px 0px #222; -moz-box-shadow: 0 -3px 4px 0px #222; box-shadow: 0 -3px 4px 0px #222; } #pagewrapper { display: block; position: relative; width: 780px; background: #fff; padding: 0; margin: 0 auto; margin-top: 117px; -webkit-box-shadow: 0 3px 7px -1px #222; -moz-box-shadow: 0 3px 7px -1px #222; box-shadow: 0 3px 7px -1px #222; } #headwrapper { display: block; width: 780px; background: #fff; padding: 0; margin: 0 auto; } /* top header */ #top { display: block; position: relative; width: 780px; padding: 0; margin: 0; top: 0; z-index: 9999; background: #303030; border-bottom: 3px solid #414d65; } #logo { display: block; width: 100%; height: 82px; top: 0; padding: 0 12px; background-color: #111; background-image: -webkit-gradient(linear, left top, left bottom, from(#303030), to(#111)); background-image: -webkit-linear-gradient(top, #303030, #111); background-image: -moz-linear-gradient(top, #303030, #111); background-image: -ms-linear-gradient(top, #303030, #111); background-image: -o-linear-gradient(top, #303030, #111); background-image: linear-gradient(top, #303030, #111); } /* navigation bar */ #topnav { display: block; border-top: 1px solid #839aca; background: #485c86; background-image: -webkit-gradient(linear, left top, left bottom, from(#5f739d), to(#485c86)); background-image: -webkit-linear-gradient(top, #5f739d, #485c86); background-image: -moz-linear-gradient(top, #5f739d, #485c86); background-image: -ms-linear-gradient(top, #5f739d, #485c86); background-image: -o-linear-gradient(top, #5f739d, #485c86); background-image: linear-gradient(top, #5f739d, #485c86); height: 32px; } #topnav ul { padding: 0 10px; } #topnav ul li { display: inline; font-size: 1.2em; } #topnav ul li a { display: block; float: left; line-height: 31px; padding: 0 7px; margin-right: 6px; color: #d1dfeb; font-weight: bold; text-decoration: none; -webkit-transition: all 0.4s linear; -moz-transition: all 0.4s linear; transition: all 0.4s linear; } #topnav ul li a:hover { background: rgba(255,255,255,0.2); text-shadow: 1px 1px 0 rgba(0,0,0,0.2); } 

Notice a lot of these codes are using CSS3 properties for gradients and transition effects. It helps to go the extra mile and spice up your design with these features. Most browsers can handle the properties, and the fallback solutions are just natively rendering properties, so it isn’t much of a downgrade.

#toparrow { display: none; width: 130px; height: 130px; position: fixed; bottom: 45px; right: 45px; cursor: pointer; background: url('http://media02.hongkiat.com/smart-header-footers-jquery/scrolltop-arrow.png') 0 0 no-repeat; z-index: 9999; } 

This last block of code targets the top arrow icon I’ve added into the page. This div is fixed onto the right side and will only appear after the header is hidden. This solution allows users to click for an instant jump up to the top of the page. It can be easier than scrolling in most cases.

Animating the Header & Footer

Inside the JS file we are putting together numerous logic statements. It is listening for the window scroll event and firing various functions depending on the circumstances. I have included source comments with each of the if{} statements to help clarify what we are checking. Let’s break it down into three major sections.

$(document).ready(function(){ var timer; $(window).scroll(function() { var topdisplay = $('#fixedheader').css('top'); var footdisplay = $('#fixedfooter ul').css('display'); var scrolltoppx = $(this).scrollTop(); 

This is the first piece which contains an event listener and some new variable definitions. topdisplay will check the current status of our header’s top property in CSS. We set the default position value at -35px, so in this case the header would be visible. Otherwise we have it hidden, and need to readjust back to -35px via animation.

The second variable footdisplay will check the display property of our footer. This will be needed for the logic of checking whether to display or hide the bottom footer element. Also we will need scrolltoppx which holds a numerical value in pixels of the total distance from the top of the screen. It will update with every user scroll event.

 if(scrolltoppx < 10 && topdisplay != "-35px") { // if we scroll up anywhere from 9px-0px and the header is hidden, // immediately display the header smoothly into the scroll clearTimeout(timer); autoDisplayHeader(); $('#toparrow').fadeOut(350); } if(scrolltoppx > 130 && topdisplay == "-35px") { // if we scroll beyond 130px and the header is still displaying, // hide the header after 700ms pause clearTimeout(timer); timer = setTimeout(function() { autoHideHeader(); $('#toparrow').fadeIn(450); }, 600); } 

Now here is the first big chunk of logic statements for calling our pre-defined functions.

The first statement checks if the header is not at -35px and we scroll back towards the top area; we need to display the header. We do so by calling a function autoDisplayHeader() which is written a bit later in the JavaScript file.

Similarly if we scroll beyond 130px and the header is still displayed, we need to hide it. This uses a different function named autoHideHeader(). But notice this code is contained inside a JavaScript function setTimeout(). After the user stops scrolling we pause for 600ms and then hide the header, simultaneously displaying the “back to top” arrow.

 if(scrolltoppx + $(window).height() == getDocHeight()) { // if the current window position + the above space equals the total window height // then the user is at the bottom of the page. // in this case we quickly display the small fixed footer if(footdisplay == 'none') { $('#fixedfooter ul').fadeIn(300); } } if(scrolltoppx + $(window).height() != getDocHeight() && footdisplay == 'block') { // if the user is not at the bottom and our footer is being displayed // we need to hide it until we re-enter the bottom again $('#fixedfooter ul').fadeOut(300); } }); $('#toparrow').on('click', function() { // when clicking the arrow we are animated immediately to the top $("html, body").animate({ scrollTop: "0px" }); }); }); 

These last few statements refer to the footer block.

We are putting together the user’s current placement on the screen added to the rest of the page height. This should equal the full window height, which is provided via a custom function getDocHeight(). This is not my own function but originally written by James Padolsey for the purpose of supporting a greater number of older legacy browsers.

The other logic statement is checking the reverse, and auto-hiding our footer once we scroll away from the bottom.

And finally the last clause is listening for when the user clicks on the #toparrow div. Notice that we are now outside of the scrolling event handler; so these are the only 2 event listeners which trigger some type of response on the page.

All of the custom functions are easy enough to understand with a bit of studying. But I have copied them below in case you are interested.

/** * functions to hide and display the header */ function autoHideHeader(){ $('#fixedheader').animate({ top: '-149px', }, 450, 'easeInBack'); $('#pagewrapper').animate({ 'margin-top': '3px', }, 450, 'easeInBack'); } function autoDisplayHeader(){ $('#fixedheader').animate({ top: '-35px', }, 400, 'easeOutBack'); $('#pagewrapper').animate({ 'margin-top': '117px', }, 400, 'easeOutBack'); } /** * cross-browser function to determine full browser height * needed to check when user hits the bottom of the webpage * source: http://james.padolsey.com/javascript/get-document-height-cross-browser/ */ function getDocHeight() { var D = document; return Math.max( Math.max(D.body.scrollHeight, D.documentElement.scrollHeight), Math.max(D.body.offsetHeight, D.documentElement.offsetHeight), Math.max(D.body.clientHeight, D.documentElement.clientHeight) ); } 

In older browsers where JavaScript is disabled there isn’t much of a loss for users. The header navigation will always stay fixed regardless of scrolling distance. So this extra technique just provides a bit of finesse to your website interface. It is also a convenience for the user to have an uncluttered browsing experience.

Be sure and check out my live demo to get a bigger picture of the whole web application.

jquery ui animated header footer autohiding intelligent tutorial

Final Thoughts

I hope this tutorial may provide some useful ideas to web developers. Many of these codes are re-usable with just a few customizations to the CSS. But you should download a copy of my demo project codes to save this working template as a resource.

Additionally if you have any thoughts or questions on the tutorial feel free to share with us in the post discussion area.


15 jQuery Carousel Plugins

Share

A common challenge during a web design project involves finding a way to display the relevant content in an attractive and usable manner. Carousels are often used for displaying images, text, and sometimes videos. If you’d prefer to save some time during the coding of the site you can use an existing jQuery plugin to create your carousel.

There are a lot of good scripts and plugins available, and in this article we’ll highlight 15 of them. Most of them are available for free download, but some of them are premium and must be purchased. Each comes with different features and options for customization. Hopefully you will find one that will be right for your next project.

CarouFredSel

CarouFredSel

CarouFredSel is a free plugin that turns any kind of HTML element into a carousel. It can scroll one or multiple items simultaneously, horizontal or vertical, infinite and circular, automatically or by user interaction. With CarouFredSel you can easily create responsive carousels for your own web design projects. It includes features like 9 built in effects, support for CSS3 transitions, and more.

Tiny Carousel

Tiny Carousel

Tiny Carousel is a free and lightweight option. It is an excellent starting point that allows you to customize the look of the carousel. With Tiny Carousel you can create horizontal or vertical slides. It supports navigation by button or paging. There are also a number of options in relation to the transitions, and Tiny Carousel can be easily customized.

jCoverflip

jCoverflip

jCoverflip is a free carousel plugin. You can control the number of items, colors, fonts, and styles through CSS. You can display images and content associated with those images. For Drupal users, jCoverflip can also be run as a Drupal module.

Elastislide

Elastislide

Elastislide is a responsive image carousel that can be used vertically or horizontally. You can set a minimim number of images to be shown, and it can also be used in an image gallery. Like most other carousels, it also includes a few options for transitions.

Responsive Image Gallery with Thumbnail Carousel

Responsive Image Gallery with Thumbnail Carousel

The Responsive Image Gallery with Thumbnail Carousel is a part of a tutorial that goes through the process of creating it. You can download the source code to use it in your own work.

Circular Content Carousel with jQuery

Circular Content Carousel with jQuery

The Circular Content Carousel with jQuery is a free plugin that slides infinitely (circular). Each item includes a “more” link and when clicking on that link expanded information on the item is displayed.

Cloud Carousel

Cloud Carousel

Cloud Carousel is a free option with 3D effects. The images rotate in a circular fashion with realistic perspective and reflections are also shown.

jQuery Banner Rotator/Content Slider/Carousel

jQuery Banner Rotator/Content Slider/Carousel

This is a premium option (cost is for a regular license) that includes a banner rotator, thumbnails banner, banner with playlist, content slider, in addition to the carousel. It includes touchscreen navigation support and is responsive.

jQuery Carousel Evolution

jQuery Carousel Evolution

This is another premium option (cost is for a regular license) that supports both images and video. You can create up to 9 different styles of carousels, optional text descriptions, support for an unlimited number of images, and it offers a lot of customization options.

Roundabout

Roundabout

Roundabout is a free jQuery plugin that easily converts unordered lists & other nested HTML structures into entertaining, interactive, turntable-like areas. It can be used to display text or images, can include a clock, can use 3D CSS effects, and is highly customizable.

iCarousel

iCarousel

iCarousel is a premium option (cost is for a regular license) that supports touch gestures. It is highly flexible and customizable to allow you to create something unique. Both 2D and 3D options are available.

Boutique Carousel

Boutique Carousel

Boutique is a premium option (cost is for a regular license) for a unique customizable jQuery image slider with perspective and smooth interactions. There are plenty of options to customize, and you can style it with CSS to suit your own needs. Features included unlimited scrolling, unlimited number of images, 14 example styles, fluid width for responsive layouts, lightbox support, and plenty of options.

Showbiz Business Carousel jQuery Plugin

Showbiz Business Carousel jQuery Plugin

Showbiz is a premium option (cost is for a regular license) to show services, portfolio items, blog contents… basically all business information thinkable. It is highly customizable, making it a good starting point.

Barousel

Barousel

Barousel is a free jQuery plugin to easily generate simple carousels where each slide is defined by an image, plus any type of related content. It includes a number of options for customization, including slide duration, navigation type, content resize, and more.

jQuery Liquid Carousel Plugin

jQuery Liquid Carousel Plugin

Liquid carousel is a free jQuery plugin intended for liquid designs. Every time the container of the carousel gets resized, the number of items in the list change to fit the new width. It includes options like height, speed of the animation, and navigation arrows.

For more resources please see:

jQuery How-To: Creating And Inserting New Element (Part 3)

Share

In this third part (click here for Part 1 and Part 2), we are going to continue our discussion on creating and inserting new element with jQuery. We have disccussed how to use the jQuery functions before() and after() to insert a new element before or after the specified element.

jQuery provides two similar functions. They are insertBefore() and insertAfter(), which sometimes lead to some confusion in their usage. How do these functions compare to before() and after()?

What’s the difference?

Both of these functions, before() and insertBefore() or insert() and insertAfter() are essentially does the same thing. But how they are executed is reversed. Let’s take a look at the following example for the detail.

We have HTML list, like so.

 <ul id="list"> <li class="list-1">Ut enim ad minim veniam.</li> <li class="list-2">Lorem ipsum dolor sit amet, consectetur adipisicing elit.</li> <li class="list-3">Duis aute irure dolor in reprehenderit.</li> <li class="list-4">Sunt in culpa qui officia deserunt mollit.</li> <li class="list-5">Excepteur sint occaecat cupidatat non proident.</li> </ul> 

Using the .after() we can write it this way to insert a new <li> element after the second list.

 $('.list-2').after('<li class="new-elem">Hello World! This is the new element.</li>'); 

The code above will first tell jQuery to search for .list-2 and it will insert the new element afterwards. Using the .insertAfter() function, the opposite will be carried out. We will first create the new element then search the target container where the element should be inserted.

 $('<li class="new-elem">Hello World! This is the new element.</li>').insertAfter('.list-2'); 

As mentioned, these functions will give us the same results, essentially.

Repositioning Element

Reather than create new elements, we can also reposition the existing elements in the document using these functions. Given the same HTML structure above, we can write it in this way to move, for example, the .list-1 to the bottom with .after() function.

 $('.list-5').after($('.list-1');); 

Or using .insertAfter() function, we can write it this way.

 $('.list-1').insertAfter('.list-5'); 

They will return the same result, as shown in the following screenshot.

The same functionality also goes to .before() and .insertBefore().

Final Thought

Which function should be used, would depend on a case-by-case situation. Sometimes we might have to use insertAfter() and there are times when using after() is not a viable option.

Lastly, we have come to the end of our jQuery series, Creating and Inserting New Element. We hope that this can be a helpful reference for you. Thanks for reading and stay tuned for our next jQuery session.


jQuery How-to: Creating and Inserting New Element (Part 2)

Share

In our previous post, we started a discussion on how to create and insert new elements with the jQuery (and JavaScript) Append method. We’ve learned how to create and insert new elements to the body document.

In its basic form, the Append method inserts the new element as the last child or (technically) before the closing tag of a specified element. In certain cases, however, we might need to insert the new element at a more specific point. In this post, we will tackle this issue.

For demonstration purposes, we have prepared the following HTML unordered list structure, containing the id, list.

 <ul id="list"> <li>Ut enim ad minim veniam.</li> <li>Lorem ipsum dolor sit amet, consectetur adipisicing elit.</li> <li>Duis aute irure dolor in reprehenderit.</li> <li>Sunt in culpa qui officia deserunt mollit.</li> <li>Excepteur sint occaecat cupidatat non proident.</li> </ul> 

Insert New Element as the First Child

In this first example, we will create a new element and insert it as the first child of a specified element (parent). As in our previous post, we will first look at how it is done purely with JavaScript and subsequently with jQuery.

The idea in the following example is we will create a new <li> and then insert it as the first child of the <ul>. So, let’s create a new element as well as the text inside it, like so.

 var li = document.createElement('li'), txt = document.createTextNode('This is the text in new element.'); li.appendChild(txt); 

To insert this element as the first child, we can use the JavaScript .insertBefore() function. This function allows us to insert an element before an existing element.

Now, we need to specify which parent to nest the new element inside. In this example, we specify the element by getting its ID attribute, like so:

 ul = document.getElementById('list'); 

Then, we need to define which element to place the "new element" before. In our case, it would be the first child of the parent. In JavaScript, we can get the first child element with .firstChild function and we store it in a variable called firstChild.

 var firstChild = ul.firstChild; 

We then apply the function. First, we set the parent element with ul variable followed by .insertBefore() function, like so.

 ul.insertBefore(); 

Inside the parentheses, we specify the new element followed by the reference element (the first child of the parent).

 ul.insertBefore(li, firstChild); 

This code above will insert the new li before the first child element. If we take a look at the browsers and inspect the element through the Developer Tool, we will get this result:

We see that our new element is now the first child of the <ul>.

Using jQuery

Alternatively, we can use jQuery. jQuery has a function called .prepend(). We can achieve the same result by writing it in this one way.

 $('#list').prepend('<li>This is the text in new element. (with jQuery)</li>'); 

Insert New Element in Specific Point

Now, how about adding the new element at a more specific point, such as before or after the 3rd child – as opposed to first and last. Here’s how we do it in both JavaScript and jQuery.

We have created a new element from the previous example, like so:

 var li = document.createElement('li'), txt = document.createTextNode('This is the text in new element.'); li.appendChild(txt); 

We need to grab the list element. In JavaScript, we use .getElementsByTagName() to select element by their tag name.

 var list = document.getElementsByTagName('li'); 

After that, we need to get the 3rd list element, which can be specified with its index number. The index number in JavaScript started from 0, thus the 3rd element would be 2 in the index. In the following code, we store this element in nthList variable.

 var nthList = list[2]; 

Now, we can use .insertBefore() function to add the new element before the 3rd child of specified element:

 ul.insertBefore(li, nthList); 

If we view the browser, we will get:

To insert the new element after it, we can use .insertBefore() function along with .nextSibling(), which specifies the next element.

 ul.insertBefore(li, nthList.nextSibling); 

Contrary to the previous example, the following code will insert the new element after the 3rd child of the specified element.

Using jQuery

jQuery introduced .before() and .after() function to simplify the process. And, we can use jQuery .eq() function to target element upon their index.

Referring to our example above, we can do the same thing with:

 $('li').eq(2).before('<li'>This is the text in new element. (with jQuery)</li>'); 

to add the new element before the 3rd child of specified element. Or, we can write it this way to insert after it.

 $('li').eq(2).after('<li'>This is the text in new element. (with jQuery)</li>'); 

Conclusion

We have learned how to create and insert new elements with JavaScript and used jQuery functions to simplify the process (yet achieve the same result). It is now up to your choice to figure out which is more efficient to your case.

Hopefully, this session can be useful for you, paticularly for those who are just getting started with jQuery or JavaScript. If you have anything to ask, feel free to add it in the comment section below.

Useful Resources

Below are a few useful resources to dig into this subject further.


jQuery How-to: Creating and Inserting New Elements (Part 1)

Share

jQuery is one of the most popular JavaScript library on the planet, which offers a lot capabilities. Using jQuery, we can easily manipulate – replace, insert, remove – elements within an HTML document and even create animation.

In this post, we are going to take a look at how to create or insert new elements within DOM with the jQuery Append method.

Insert New Element

Appending is a method of creating and inserting new element within a specified element, it technically inserts the new element right before the closing tag of that specified element – thus becoming its child element.

Before we proceed, we will first show you how to do it purely with JavaScript, so you can see how much simpler jQuery can make the method.

In JavaScript, before we are able to add an element to the document, we need to define (create) the element. We can use .createElement() function to create a new element. In the following example, we create a new <div> element and store it in a variable named div.

 var div = document.createElement('div'); 

By the time we define a new element with this function, it only creates the element, but it doesn’t insert the new element to the document. We need to call one function, that is .appendChild() to insert that element. In the following example, we will insert this new <div>, simply, in the body document.

 var div = document.createElement('div'); document.body.appendChild(div); 

If we inspect the document in Developer Tool, you should see that our div element has been inserted there, before the body closing tag.

Now, let’s see how we do the same thing with jQuery. jQuery makes manipulating document elements simpler. jQuery provides a function called .append().

In the following example, we append a <div> to body document.

 $('body').append('<div>'); 

Like what we have demonstrated with JavaScript, the code line above returns the same result. It creates a new element and inserts it before the body closing tag. But we did it in fewer lines of code.

A note to remember, JavaScript does not save or alter document physically. Thus, when we view the actual document source, the elements that are generated by JavaScript will not be found.

Insert New Element with Text

Let’s go a bit further with this method. This time, we will insert a new element with text inside it. Like before, we will see how to do it purely with JavaScript.

To do so, we need to define the new element and the text. Since we will add text, we can create a paragraph element in this example.

 var p = document.createElement('p'); // create new paragraph element 

Next, we need to define the text. The text in JavaScript is created using .createTextNode() function. In this example, we store the text value in a variable named txt.

 var p = document.createElement('p'), txt = document.createTextNode('This is the text in new element.'); 

At this point, we have two variables, which store the new element and the text respectively. However, they are still separated and can stand alone. To insert the text to the new element we have created, we can run the same .appendChild() function, like so.

 p.appendChild(txt); 

Then again, we run .appendChild() to insert the element to the body document.

 document.body.appendChild(p); 

If we see it in the browser or through the Developer Tool, we get:

In jQuery, the process is simplified. Instead of separately defining two variables for the text and the new element, we can write them together with .append() function, like so.

 $('body').append('<p>This is the text in new element.<p>'); 

The above code essentially does the same thing, it will insert the the text with <p> element to the body (before the body closing tag).

Final Thought

You can see that using jQuery with .append() function, we are able to dynamically add new elements in a slimmer way than using pure JavaScript. But of course, there are times when using the JavaScript is better than loading jQuery Library – which is why we will also show you how to do it.

This article is only the beginning. In the next part, we will see how to insert element in more advanced way. So, stay tuned!

If you have some questions upon our discussion in this post, feel free to add it in the comment box below.